Building an Automated Sentinel Incident Reporting System with Azure Logic Apps
Sentinel Alerts to Actionable Insights: Streamlining Security Incident Communication with Power-Packed Logic Apps


Introduction
Security teams require immediate notification when incidents are detected in Microsoft Sentinel. By leveraging Azure Logic Apps, we can create a workflow that automatically transforms Sentinel incidents into professionally formatted email reports. In this blog post, we'll examine how to build this end-to-end solution, breaking down each step of the Logic App workflow.
This tutorial provides a basic template that you can use as a starting point for your own incident reporting system. The beauty of Logic Apps is how easily they can be customised and expanded to meet your specific requirements - whether you need additional data enrichment, integration with ticketing systems, or more complex approval workflows.
Why Automate Sentinel Incident Reporting?
Security Operations Centre (SOC) analysts and IT security teams face constant pressure to communicate security incidents quickly and effectively. Manual reporting is:
- Time-consuming
- Prone to formatting inconsistencies
- Potentially missing critical details
- Diverting analyst time from actual investigation
An automated reporting system ensures consistent, comprehensive incident communications while allowing security personnel to focus on remediation.
Prerequisites
- Microsoft Sentinel workspace
- Logic App with System Assigned Managed Identity
- Appropriate permissions on Entra ID and Sentinel
Create a Logic App with System Assigned Managed Identity
First, we need to create a Logic App with a System Assigned Managed Identity that will have permissions to read Entra ID groups and manage Sentinel watchlists.
- Navigate to the Azure portal and create a new Logic App
- Once created, go to Identity under Settings
- Switch the Status to On under the System assigned tab
- Click Save to create the managed identity
Enable Logic App System Assigned Managed Identity
After enabling the System Assigned Managed Identity, you'll see that your Logic App now has an Object (principal) ID.
Now we need to grant the managed identity the necessary permissions to work with Microsoft Sentinel.
Assign roles directly from the Logic App
- In your Logic App's Identity page, click on Azure role assignments
- Click Add role assignment
- Configure the role assignment:
- Scope: Resource group
- Subscription: Select your subscription
- Resource group: Select the resource group containing your Sentinel workspace
- Role: Microsoft Sentinel Reader
- Click Save
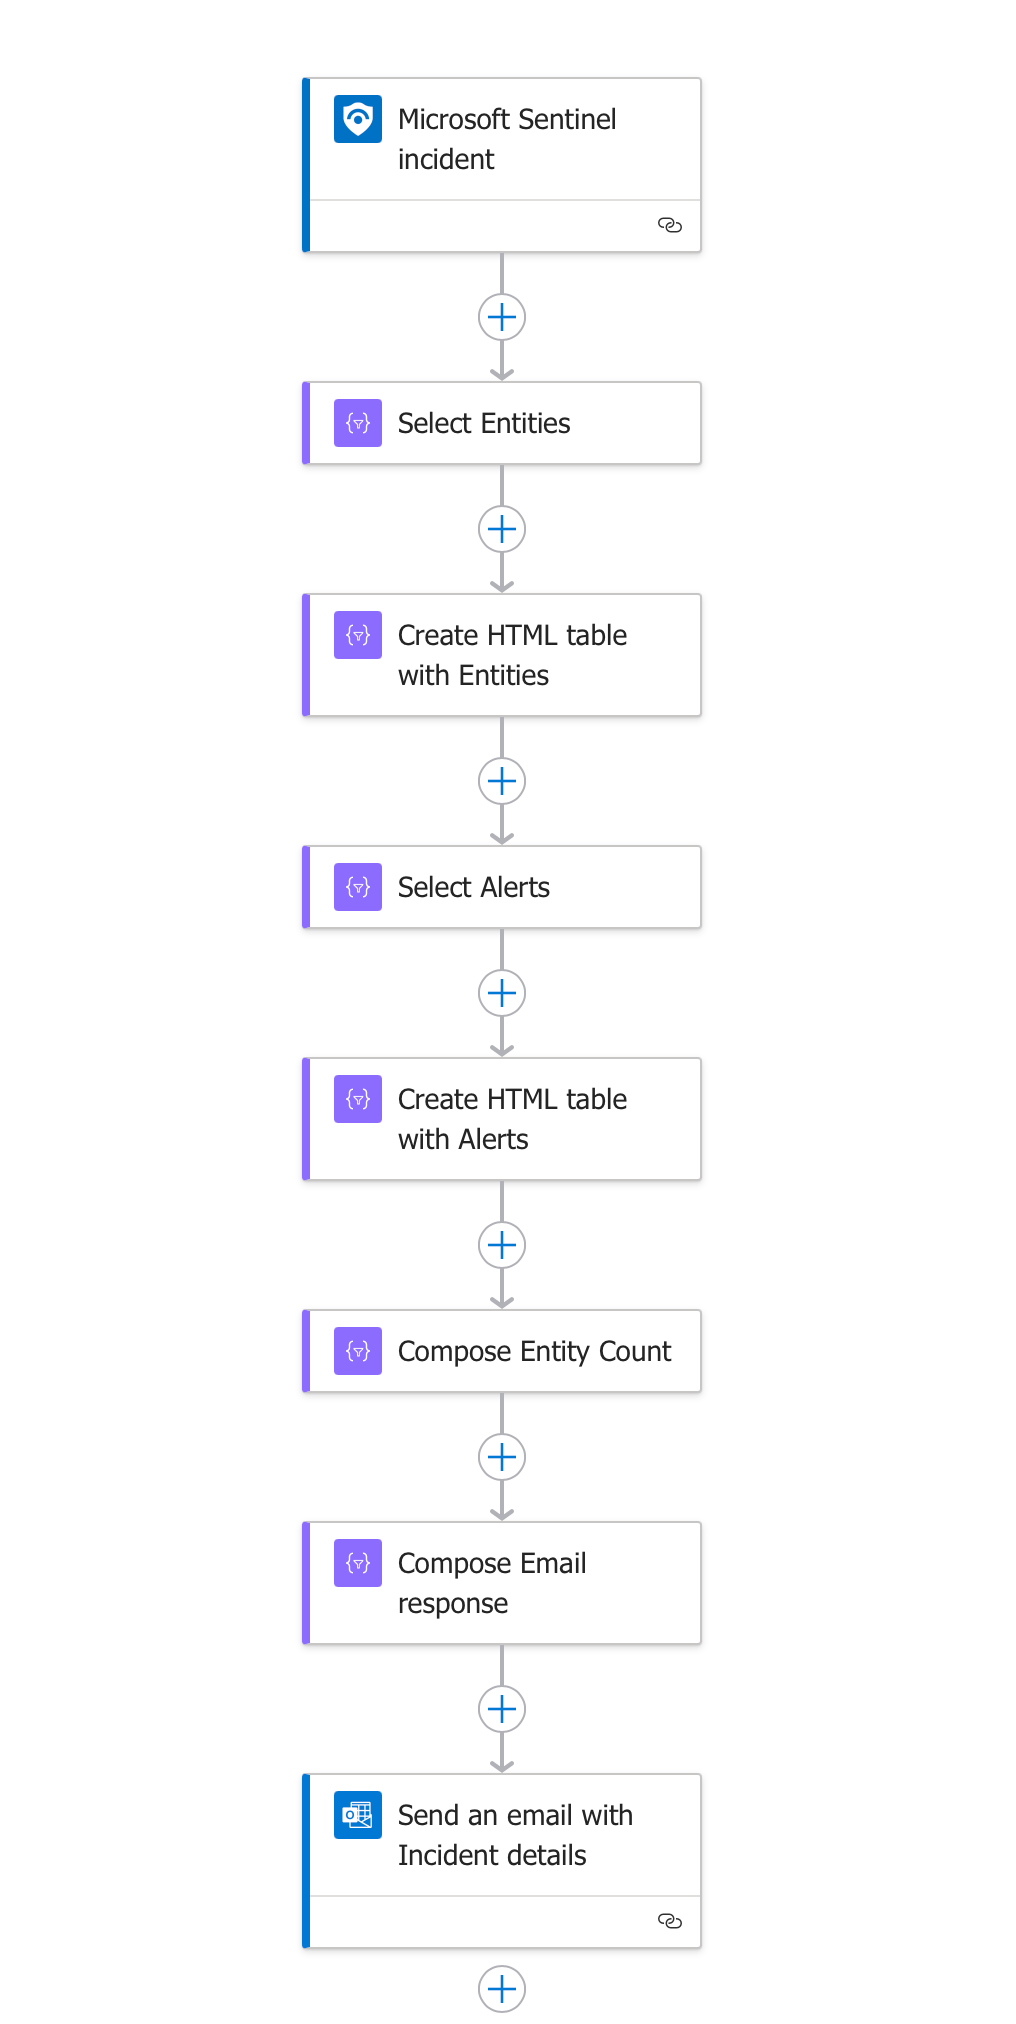
The Complete Logic App Workflow
Let's examine each component of our Logic App workflow in detail:
Configure Logic App Parameters
Before creating the workflow trigger and actions, we'll set up parameters to make our Logic App more flexible and reusable. These parameters will allow you to customise the email report without modifying the underlying workflow logic.
To create parameters in your Logic App:
- In the Logic App Designer, click on the Parameters button at the top of the editor
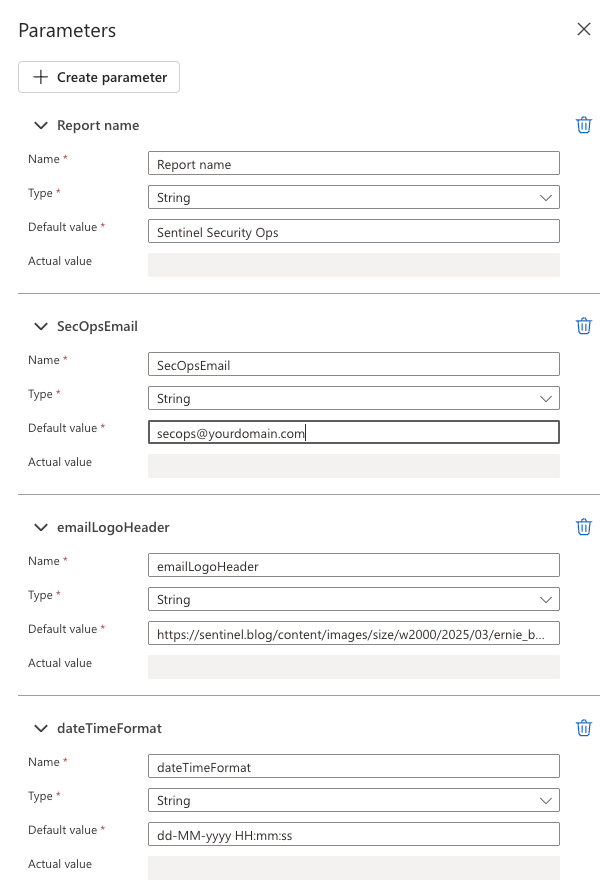
- Click + Create parameter to add the following parameters:
Report name
- Name: reportName
- Type: String
- Description: The title displayed at the top of the email report
SecOpsEmail
- Name: SecOpsEmail
- Type: String
- Description: Contact email address for your security team
emailLogoHeader
- Name: emailLogoHeader
- Type: String
- Description: URL for the header image in the email
dateTimeFormat
- Name: dateTimeFormat
- Type: String
- Description: Format for dates and times in the email report
These parameters will be referenced throughout the workflow and in the HTML email template, allowing you to:
- Customize branding with your organisation's logo
- Set appropriate contact information
- Format dates according to your regional preferences
- Change the report title without modifying the template
Parameters make your Logic App more maintainable and adaptable to different environments or organisational requirements. They also facilitate easier handover to other team members who might need to manage the workflow in the future.
1. Trigger: Microsoft Sentinel Incident
The workflow begins when a new incident is detected in Microsoft Sentinel.
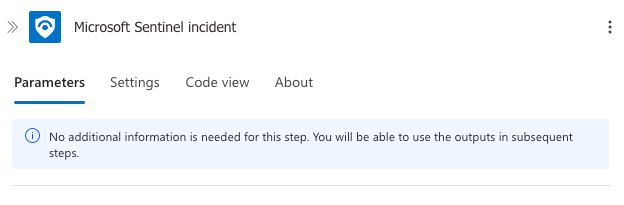
Configuration Details:
- Triggers on Microsoft Sentinel incidents (could be configured against an automation rule or triggered manually on the incident)
- Captures incident properties including ID, title, severity, description and tactics
- Can be filtered to specific severities if needed
- Requires Microsoft Sentinel Reader permissions
2. Select Entities Action
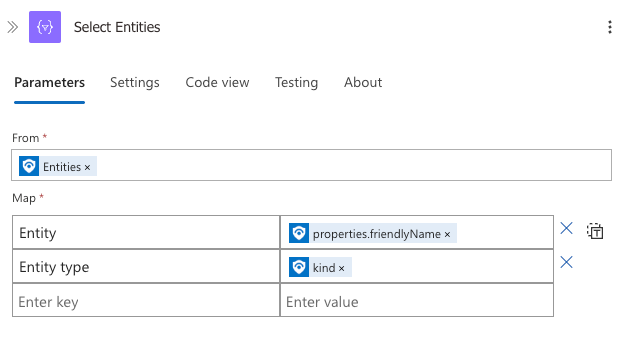
This action extracts and maps entity information from the incident.
Configuration Details:
- From: Set to
Entitiesfrom the trigger output - Map: Creates a structured representation with:
- "Entity" column mapped to
@{item()?['properties']?['friendlyName']} - "Entity type" column mapped to
@{item()?['kind']}
- "Entity" column mapped to
This step transforms complex entity data structures into a simple format that extracts just the entity name and type, preparing it for display in the HTML table.
3. Create HTML Table with Entities
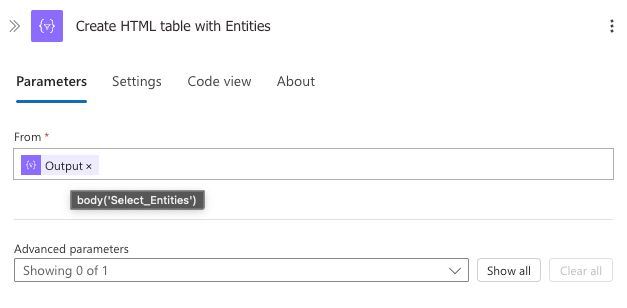
This action converts the entity data into a formatted HTML table.
Configuration Details:
- From: Set to
body('Select_Entities') - Uses the built-in HTML table generator to create properly formatted HTML
The result is clean HTML code that will render as a professional table in the email report, showing entities like accounts, IP addresses, and cloud applications involved in the incident.
4. Select Alerts Action
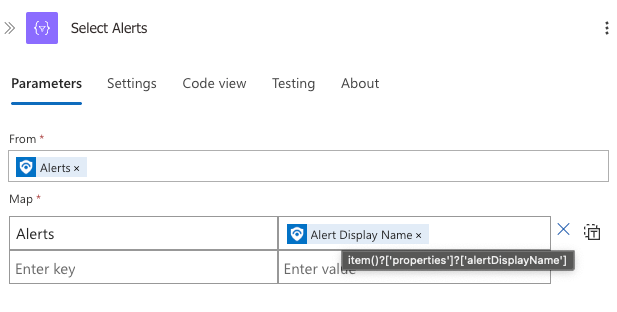
Similar to the entities step, this action extracts alert information from the incident.
Configuration Details:
- From: Set to
Alertsfrom the trigger output - Map: Creates a structured representation with:
- "Alerts" column mapped to
@{item()?['properties']?['alertDisplayName']}
- "Alerts" column mapped to
This extracts the human-readable alert names that triggered the incident, preparing them for display in the email report.
5. Create HTML Table with Alerts
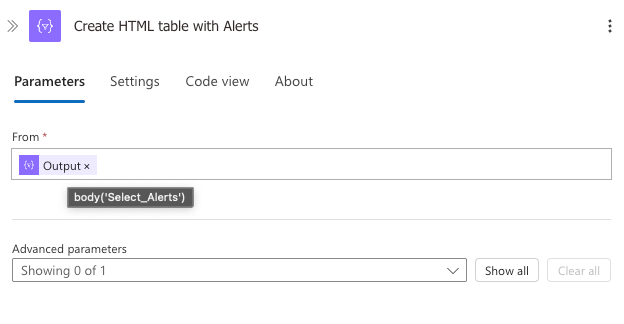
This action converts the alert data into a formatted HTML table.
Configuration Details:
- From: Set to
body('Select_Alerts') - Automatically generates HTML table code for the alerts section
The result is another HTML table that will display all alerts associated with the incident in the final email report.
6. Compose Entity Count
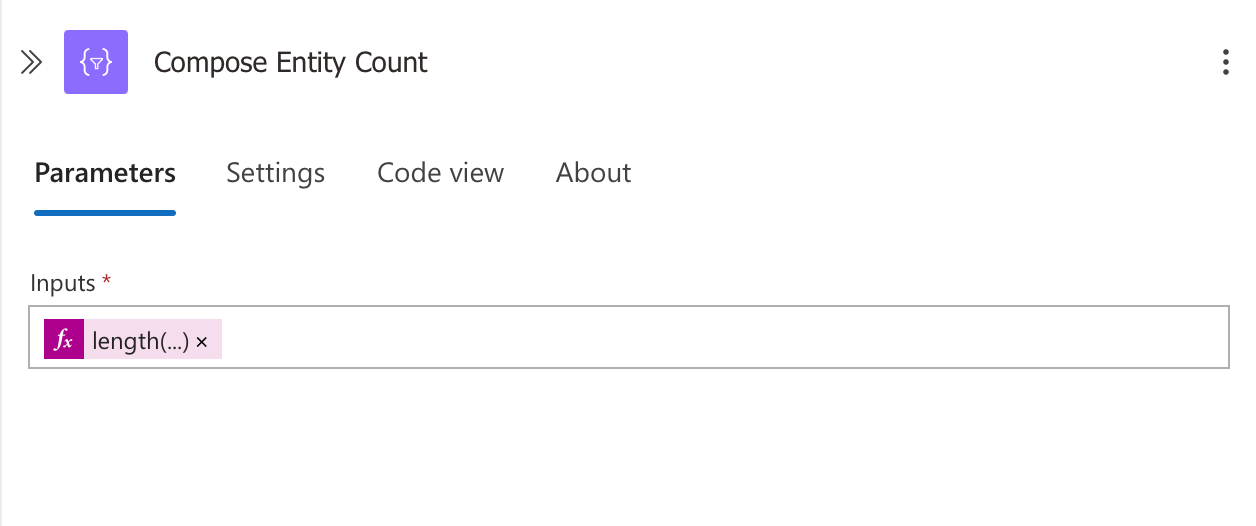
This action calculates a count of related entities that are provided in the incoming incident data, we use a Logic App expression length() function to count the number of alerts in the relatedEntities array from the incoming trigger payload.
Expression
length(triggerBody()?['object']?['properties']?['relatedEntities'])
7. Compose Email Response
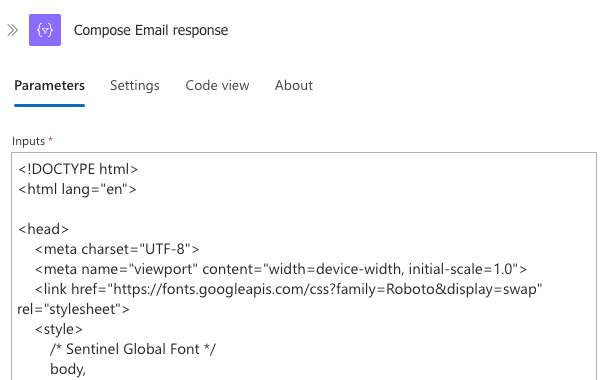
This action builds the complete HTML email using a template that includes branding, formatting, and placeholders for dynamic content.
The template provides a professional, structured way to notify security teams about incidents detected in Microsoft Sentinel. The template includes several customisable parameters and dynamic content.
Customizable Parameters
The template includes these key parameters that can be replaced Pasted_Text_1744468547977.txt:
@{parameters('emailLogoHeader')}- Custom header image URL@{parameters('reportName')}- Custom report name@{parameters('dateTimeFormat')}- Custom date/time format@{parameters('SecOpsEmail')}- Contact email for the security team
Dynamic Content Elements
The template incorporates various dynamic elements from the incident data:
- Formatted timestamps:
@{formatDateTime(triggerBody()?['object']?['properties']?['createdTimeUtc'], parameters('dateTimeFormat'))} - Incident properties:
@{triggerBody()?['object']?['properties']?['description']} - Entity table:
@{body('Create_HTML_table_with_Entities')} - Alerts table:
@{body('Create_HTML_table_with_Alerts')} - MITRE ATT&CK tactics:
@{join(triggerBody()?['object']?['properties']?['additionalData']?['tactics'],'<br>')}
Additional Dynamic Elements
The template also includes:
- Severity indicators that change color based on the incident severity
- Metrics showing alert count, entity count (using the
Compose_Entity_Countaction), and severity - A timeline showing first activity, incident creation, and notification
- Recommended actions section
- Investigation button linking to the incident URL
When implementing this template, you'll need to ensure your Logic App:
- Creates the HTML tables for entities and alerts
- Calculates the entity count as shown in your screenshot
- Sets the appropriate parameters for your organization
- Properly formats the timeline based on available timestamps
This approach allows for easy customization without modifying the core template, making it adaptable across different environments and organizational requirements
7. Send an Email with Incident Details
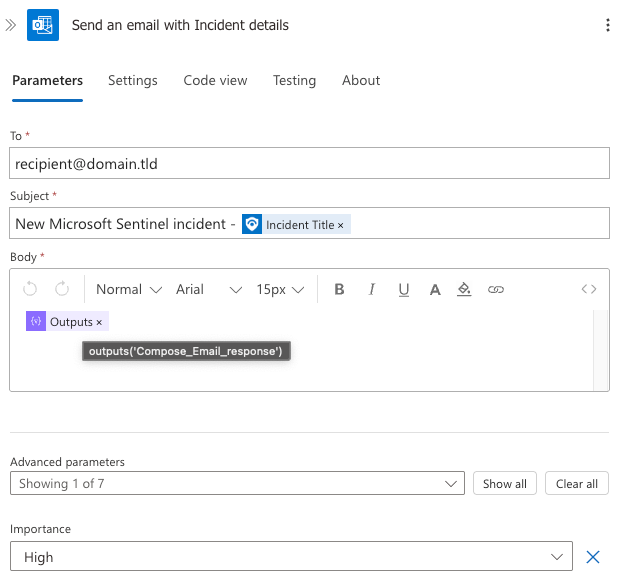
The final action delivers the formatted email to designated recipients.
Configuration Details:
- To: Security team distribution list or stakeholders
- Subject: "New Microsoft Sentinel incident - " followed by the incident title dynamic object
- Body: Output from the "Compose Email response" step
- Importance: Set to "High" to ensure visibility
- Uses Office 365 Outlook connector for reliable delivery
The Final Result
The result is a professional, consistently formatted email that looks like this:
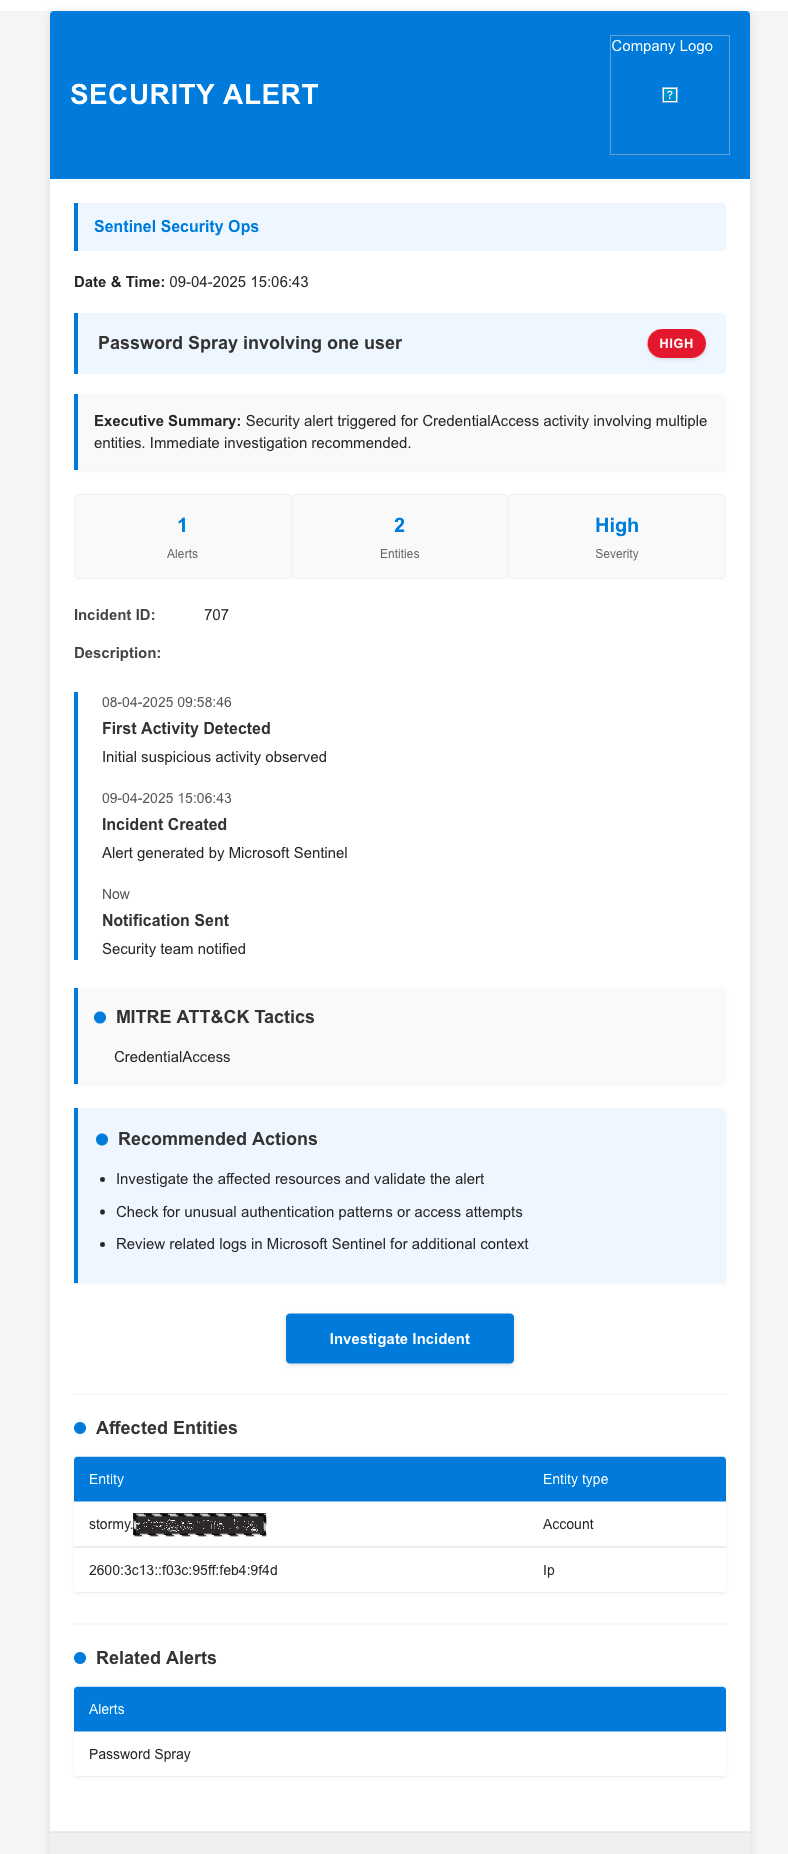
Key features of the email include:
- Professional security alert template for Microsoft Sentinel
- Clean, visual dashboard design with severity indicators
- Executive summary section for quick incident overview
- Key metrics display showing alert count, entity count, and severity
- Visual timeline showing incident progression
- MITRE ATT&CK framework integration
- Actionable recommendations section
- Entity and alert tables for detailed information
- Single-click investigation button
- Customizable parameters for organizational branding
Getting the Code
I've made the HTML template available on GitHub for you to download and use in your own environment. You can find it at below.
Benefits of This Approach
Implementing this Logic App workflow provides significant advantages:
- Time Efficiency: Eliminates manual report creation
- Consistency: Every incident follows the same professional format
- Comprehensiveness: All critical information is automatically included
- Prioritisation: High importance flagging ensures visibility
- Actionability: Direct links to Sentinel for investigation
- Scalability: Works with any volume of incidents
Conclusion
Automating Microsoft Sentinel incident reporting with Azure Logic Apps transforms the way security teams communicate about incidents. This solution ensures that stakeholders receive professional, consistent, and comprehensive incident reports without diverting analyst time from critical security work.
The workflow we've detailed here serves as a solid foundation, but I am keen to hear how you've enhanced it for your own environments. Have you extended the workflow to include additional data sources? Integrated it with ticketing systems? Added approval workflows for critical incidents? Please share your scenarios and templates in the comments section below or contribute to our GitHub repository.
I hope you've found this guide helpful in enhancing your security posture. If you've enjoyed this content and would like to support more like it, please consider donating to the tip jar. Your support helps me continue creating practical security automation content for the community.
What security automation challenge would you like to tackle next?